Monday, May 21, 2012

Quickie update by phone...

Quickie update...  The outside of the hull is 'glassed, apart from the stern transom.  Also, my box of rope and sail hardware came in from Duckworks.  Very handy people :)

This is being published from my phone while I'm at lunch.  Otherwise I'd be more wordy.  

Oh, as the Bullduck is getting close to sailing, I found a good lake about 2.5 hours from my house, up near Augusta.  The local windsurfers like it, so I have high hopes...  There's camping there, too!  Maybe a future messabout location :)


Thursday, May 17, 2012

Getting the airboxes done... sorta :)

Okay!  With the torrential rains we've been getting lately out of the way, I got the port airbox painted out with Thompson's, and did the underside of the front deck.   After an hour or three to allow it to dry, I applied more of the Tightbond III glue to the surfaces to be joined.  I've been applying the glue to both surfaces of each join.  This takes more glue, but one of the woodworking magazines that I read had  a very interesting article on glue-up (in furniture, but close enough) that measured the strength of bonds made by various techniques, and what happened to the glue.  It turned out that when they only hit one surface (vice both) with the glue, that one side absorbed a lot of the moisture and starved the untreated surface of glue.  Anyhow, even if it's wrong, I feel better hitting both surfaces of each join.  Thus far, I've gone through about 1.5 bottles of TBIII (the bigger cylindrical size, not the 'Elmers'-shaped bottle).  And here we are:


The Bullduck sits majestically on the back porch, both airbox tops and the forward deck securely fastened, with the glue drying.  The 1/4-turn hatch is just fitted, not glued and screwed, yet.  I want to get the fiberglassing and painting done before that happens...


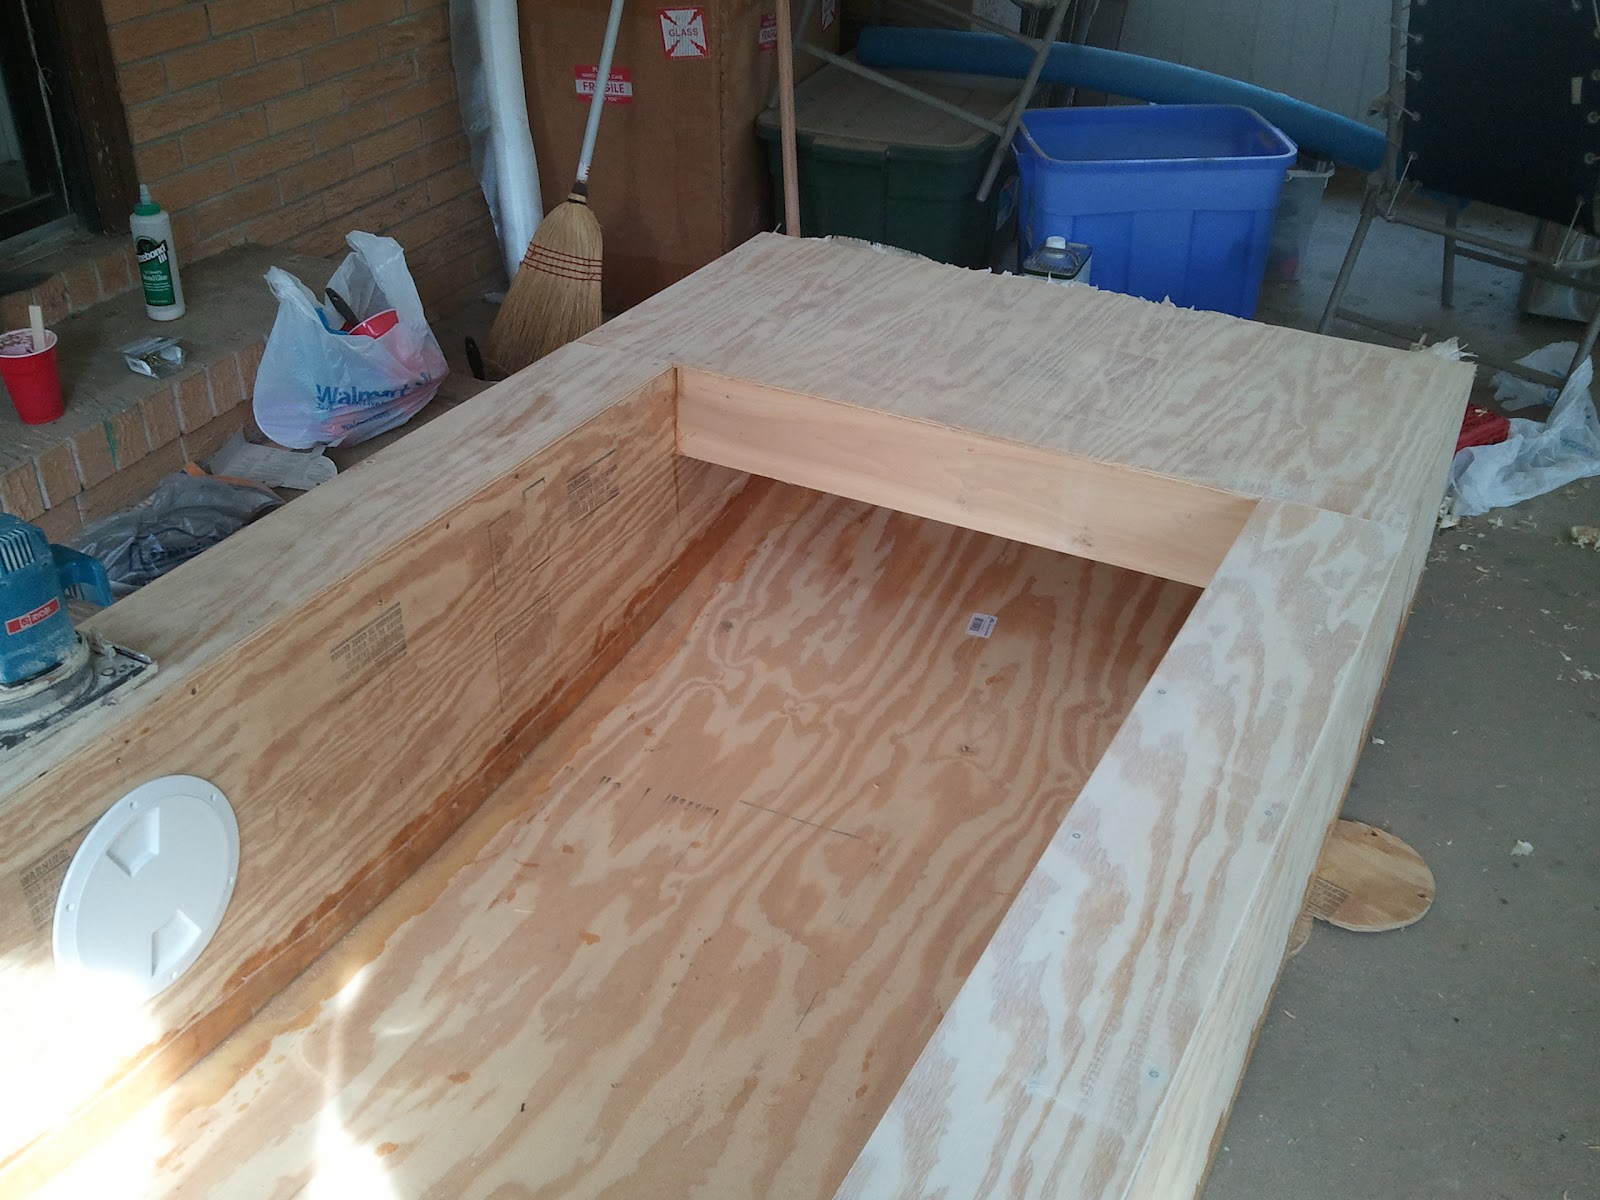
From the stern, you can see one of the supports for the front deck.  It's a piece of poplar that I had sitting around the shop.  It will also be part of the mast mounting system.  (If that sounds silly, I was in the Navy, and everything has to be 'the such-and-such system', or a part of one :)

I know I'm overbuilding the fwd deck supports.  I don't intend to walk up there, but someday, I'll probably have need to, and I want it strong enough for that moment :)


View from the bow; first, great credit goes to man's best friend, sitting on the port airbox.  The power sander.  Much love for this tool right now :)
On the stern transom, you can see the piece of 3/4" thick oak I put there to back up the 3/8" ply that makes up the stern, where the rudder will mount.  Submarine thing: Everything that CAN be rediculously overbuilt, SHOULD be so. 


Much sanding remains to be done before I can glass the airboxes and forward deck with a clean conscience, but that's okay.  The effort helps me spiritually to take ownership in a way that paying someone for a boat would not.  However silly it may seem, while the Bullduck has not even been afloat yet, I feel no shame in bragging to the nurses at work about the work I've done on my sailboat :)

Monday, May 14, 2012

More progress!

I've been working on the boat so furiously that I haven't updated in like a week!  Sorry! 

Last weekend, I got out the trusty-dusty power sander and sanded the crap out of the bottom of the hull, preparing it for fiberglassing.  Tux the Cat does NOT like the sound of the sander.

I rounded the edges of the bottom with the hand plane, then sanded them rounder with the power sander.
I happened to have a good-sized roll of medium-weight fiberglass cloth from a previous project.  It's 5 feet (~1.5m) wide and as long as I need it to be.so I cut two 4 foot long pieces and have a decent overlap in the middle of the bottom.
Above you can see where the glass cloth just falls around the curve at the bottom edge of the bow transom.  Without the curve in the wood, the glass cloth would NOT go smoothly, and that leaves you with all kinds of air bubbles and ugliness where you asked the cloth to curve around a sharp angle.
Aaaand THIS is what the Bullduck looked like with the glassing finished on the bottom and front transom.  Purty!  With the West System epoxy (actually made for real boats, so it's fully waterproof) and the Fast hardener, it takes a few hours before you can sit on it :)   So I left it to dry and went to find a diet coke.  Keys to good smooth job: Don't skimp on the epoxy, get rid of all the airbubbles you can see, and don't let the wife catch you ont he back porch sans dropcloth! 

Even with both ceiling fans going, it was hot work in the Georgia heat.

Sunday, May 6, 2012

My Puddle Duck Racer (PDR)

I spent probably 20 hours, give or take, to get to this stage: My hull is no longer a collection of plywood in the back of the shop, it's 3-dimensional!
That's the BullDuck on its side.  You can see the side air chambers pretty well;  they'll help keep her afloat when/if she tips.  Each one is supposed to have 300-some-odd pounds of bouyancy, so you can basically fill the cockpit with water and it'll still float while you bail.  The more astute reader will notice that the bow and stern are both flat.  This boat was designed to be easy for the first time boat-builder.  Which is a Good Thing.  I've build many many scale warships (some as big as 6 feet long), but this is a LOT bigger (8 feet is barely more than 6, but this is about 3 feet wider than the models).  And hey, I'm going to be out on the water in it!  So I want something that I can learn on and make it back in.  The small size is a plus, too, because I can throw it in the bed of my pickup for transport. 
This is a view of BD, bottoms-up.  You can see the curve to the bottom, and the flat stern.  Flat stern also good for ease of mounting rudder.  The dark line that looks like a massive crack is just a stain or somesuch.  I promise.  Remember, I'm the one going out in it!  Tomorrow, I will be rounding off the edges of the bottom, preparatory to fiberglassing it.  I already had some medium 'glass cloth from a previous project, and I have a big gallon jug of West Systems marine epoxy resin.  They make big boats out of it, it'll do fine here.  The fiberglassing is to help the bottom take some abuse in handling.  I will also be hitting the corners with fiberglass tape to seal the edges of the big box store plywood.

Now, I must go back onto the back porch and get domestic.  Because my VERY understanding wife would really love it if there are no wood shavings and junk back there.  The boat gets to stay, because she likes to come check on me (and the cat) while I work :)